This article gives you the steps on how to mark the attendance of the students.
This includes generally marking attendance at the point of lessons and pre-recording explained absences.
There are 4 ways to mark attendance in the system, in the class list, class view, daily view or in the student profile modal.
In the class list
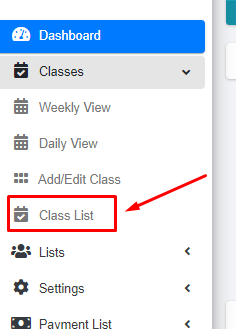
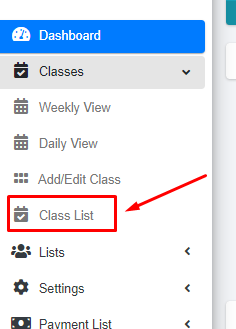
Step 1 - Within the Classes menu, click “Class List”.
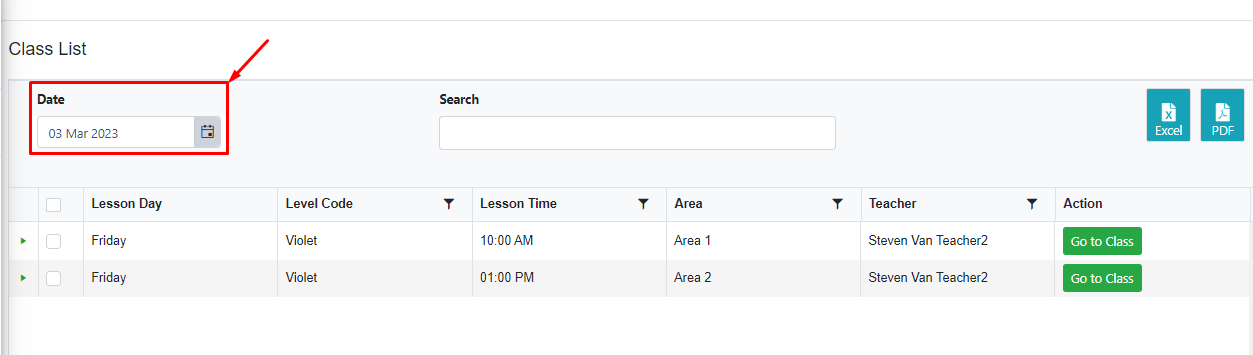
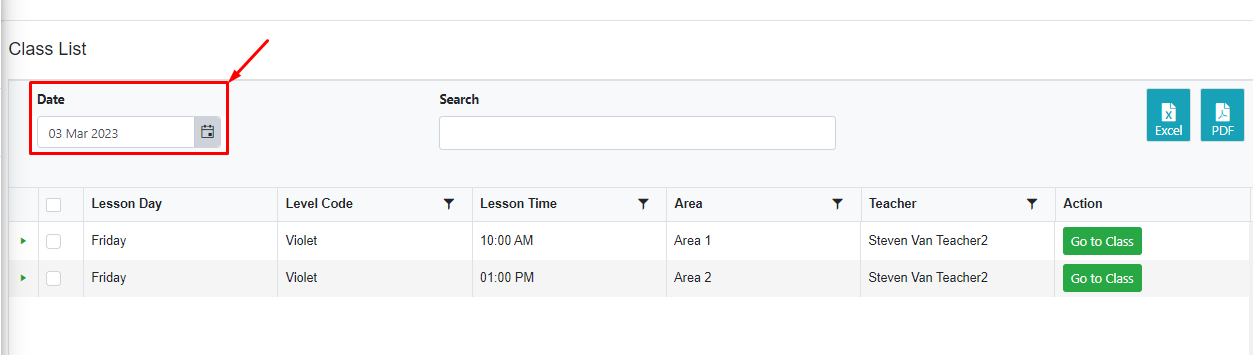
Step 2 - Select a date in the date field.
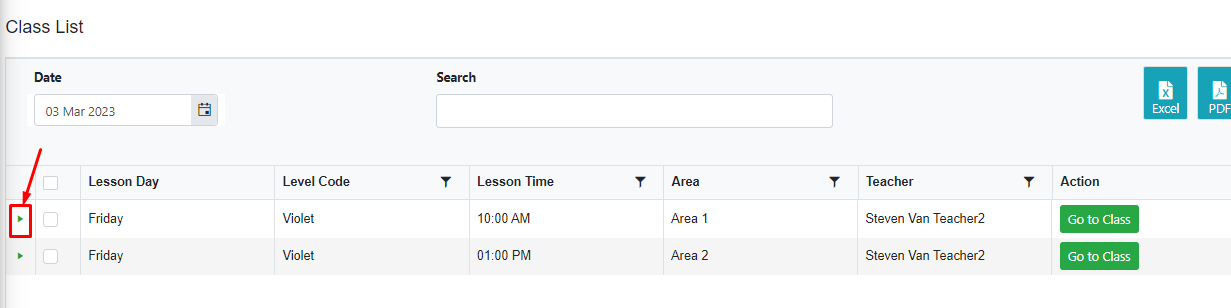
Step 3 - Find the class and expand it by clicking the arrow.
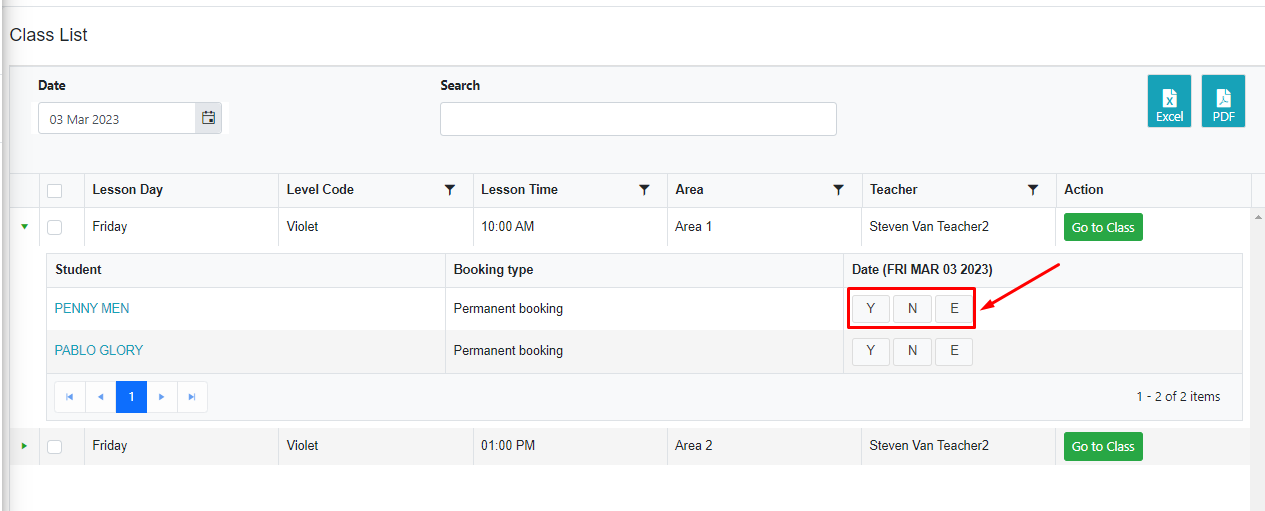
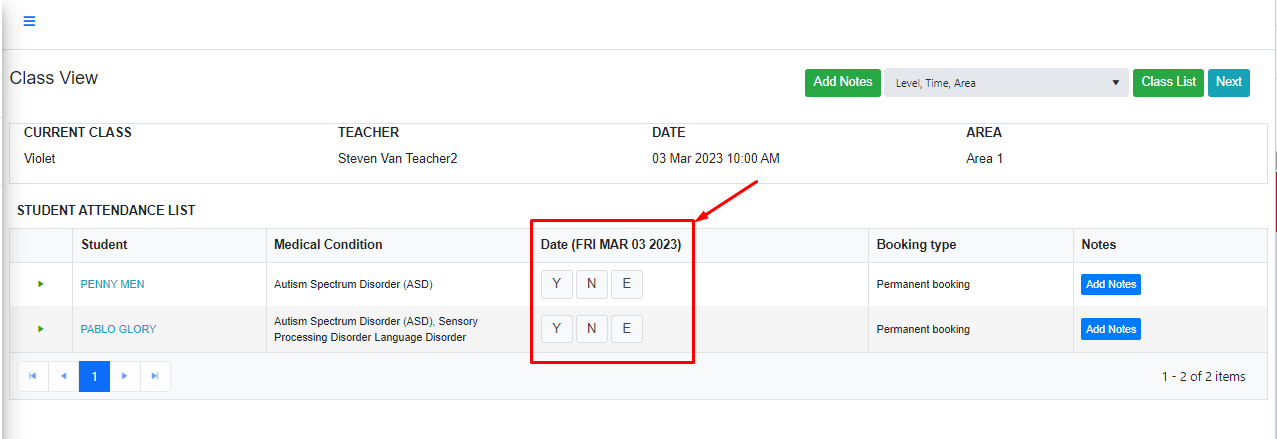
Step 4 - Find the student and mark their attendance by clicking it. Y for Present, N for Not Present, and E for Explained Absence.
In the Class View
Step 1 - Within the Classes menu, click “Class List”.
Step 2 - Select a date in the date field.
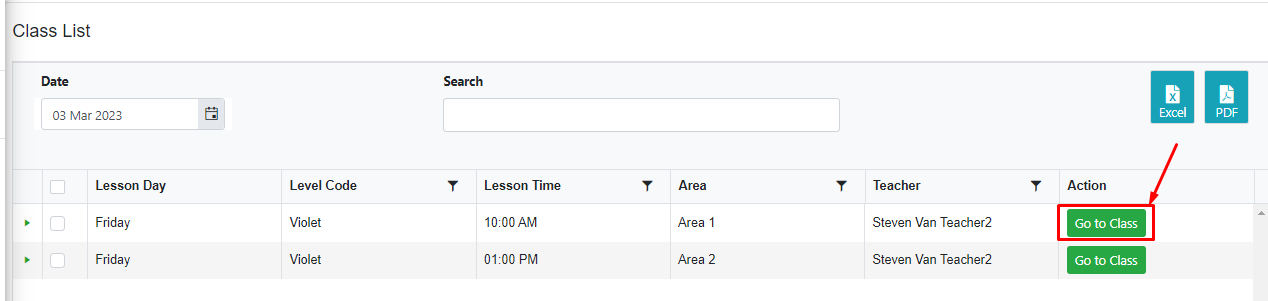
Step 3 - Find the class and then click the button “Go to Class”.
Step 4 - Find the student and mark their attendance by clicking it. Y for Present, N for Not Present and E for Explained Absence.
In the Student Profile modal
Marking attendance through the student profile is ideal for situations such as pre-recording explained absences.
For example, if a customer tells you they will be away from lessons in a few weeks time, you can record that absence by following the steps outlined below.
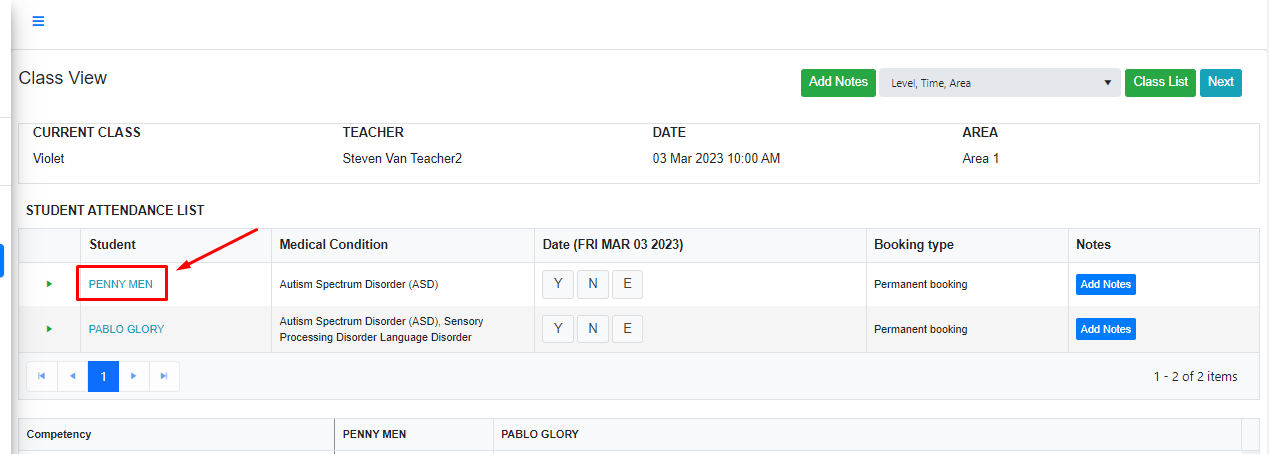
Step 1 - Students are everywhere in the system, just click the selected student and it will open their modal.
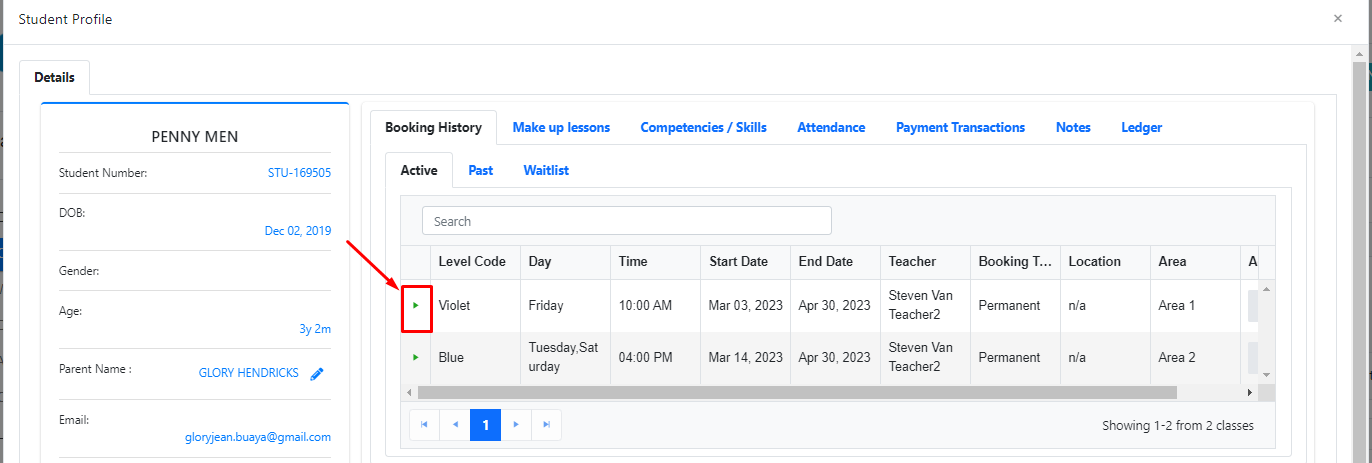
Step 2 - In the student profile modal, expand the class by clicking the arrow and it will list the attendance date.
Step 3 - Mark their attendance by clicking it. Y for Present, N for Not Present, and E for Explained Absence.
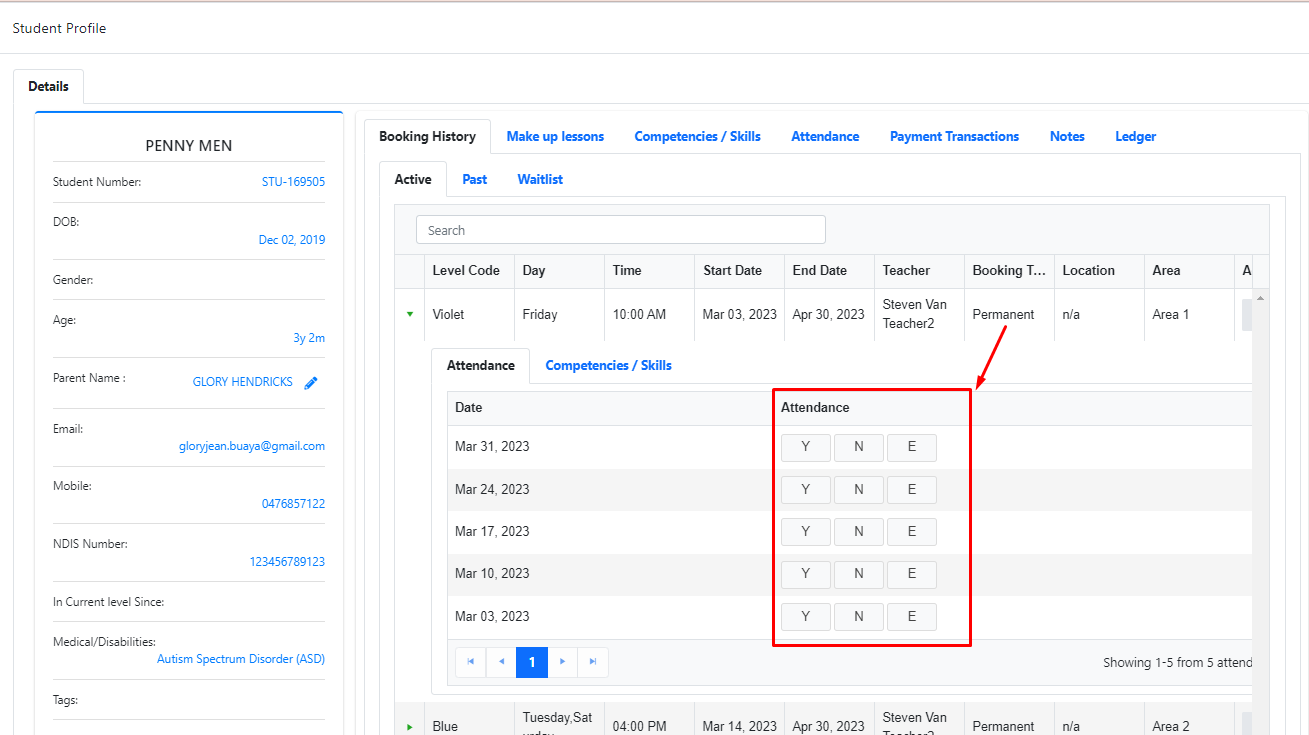
All done! The student attendance is now saved.
Was this article helpful?
That’s Great!
Thank you for your feedback
Sorry! We couldn't be helpful
Thank you for your feedback
Feedback sent
We appreciate your effort and will try to fix the article