A user type dictates what functionality a user can access via their login.
For example, a Teacher may only have access to a few features and actions whilst a manager or admin may have access to almost all functionality.
The user-type settings are only available via the admin or manager-level logins.
User types can also link to specific locations if you have multiple locations set up in your account.
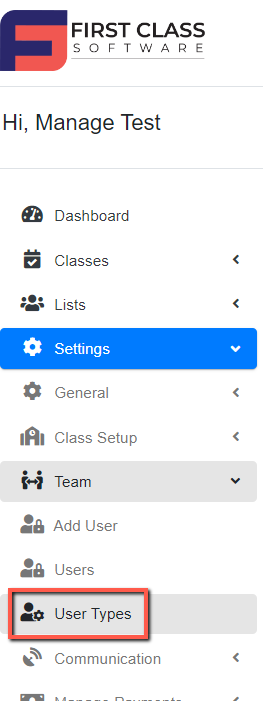
To set up a user type, go to the Settings menu, then under the Team tab, select User types.
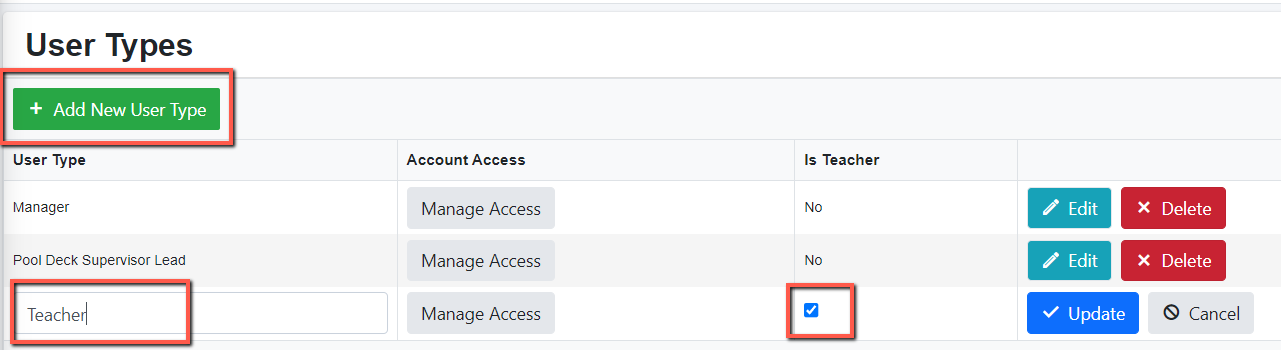
To add a user type, click “Add New User Type”. Enter the name of the user type you wish to create - Eg. Teacher, Manager, etc.
If you’re creating a teacher user, tick the box that says “Is Teacher”.
If staff with this user type should have full access to Account Settings, tick the box that says “Is Admin”. See “Giving a user type access to Account Settings” below.
Click the Update button to save the new term.
NOTE: For the teacher, it will show all their classes, regardless of their locations.
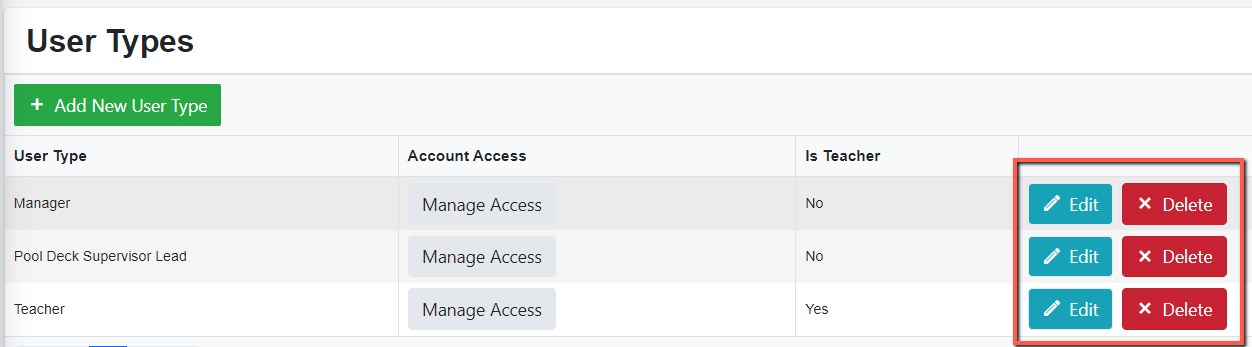
You will see a list of created user types. If you wish to edit or delete any user type, you may click the Edit or Delete button.
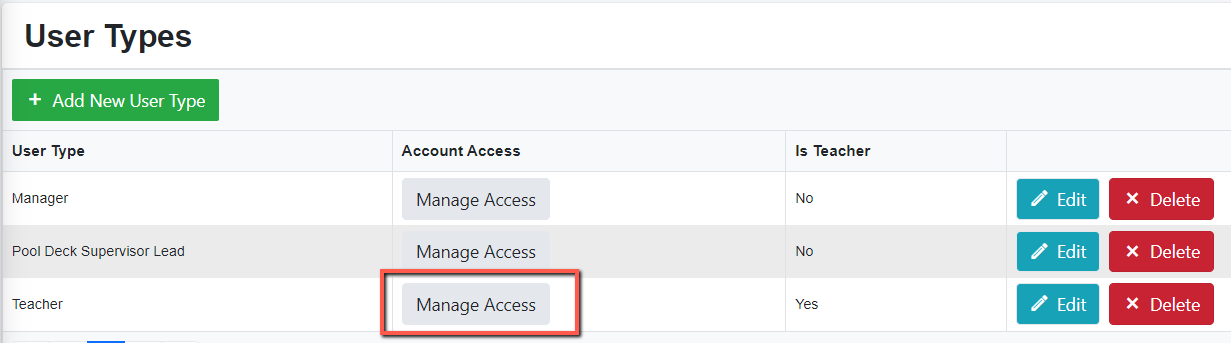
To enable access for the user type, click “Manage Access” beside the user.
Tick on the boxes beside the feature that you want the user to access. The example below shows features for the Teacher user type.
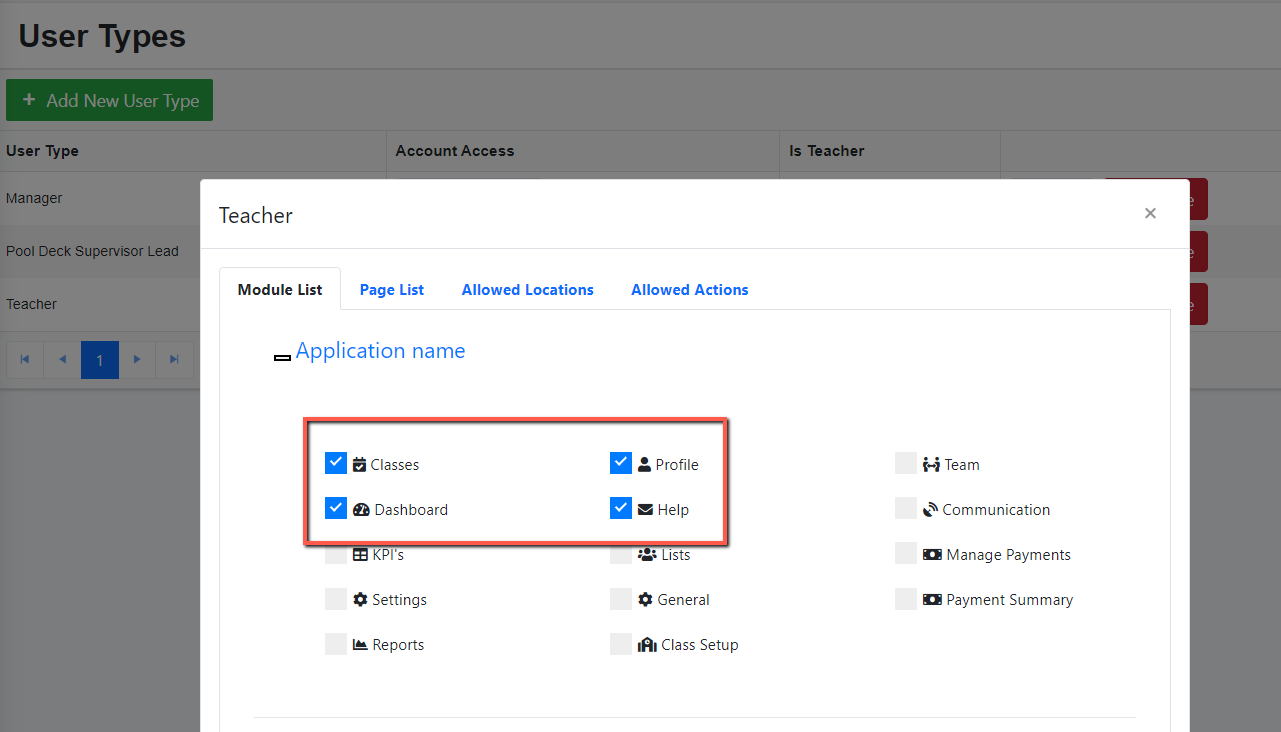
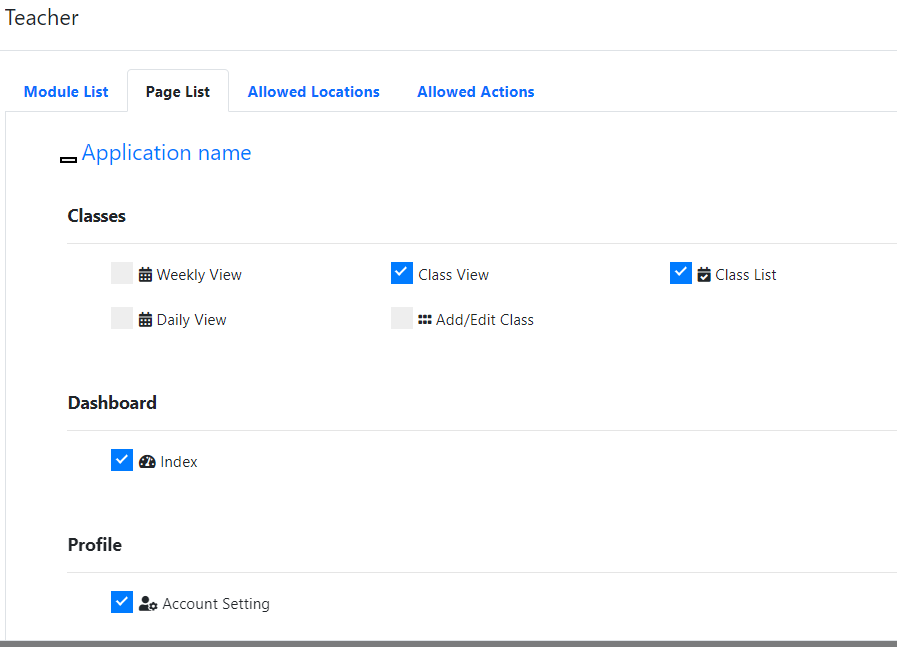
Once you tick the boxes, it will automatically save. Once done, just close the pop-up page.
Which classes staff can see
Any active staff user can be assigned to a class in the instructor field, whatever their user type.
Which classes a staff member can see is set for each user, not on the user type, with the Restrict to Own Classes setting (Settings > Team > Users):
Ticked: they only see the classes they are assigned to.
Unticked: they see all classes in their allowed locations.
Existing teacher logins have Restrict to Own Classes ticked, so they still only see their own classes.
NOTE: Managers or supervisors who also teach no longer need a second, dormant teacher login. Assign their main login to their classes and leave Restrict to Own Classes unticked.
Giving a user type access to Account Settings
The Account Settings page is where you update your business details, logo and account options. The main admin account always has full access to it.
To give other staff the same access, tick “Is Admin” on their user type:
Go to the Settings menu, then under the Team tab, select User types.
Click Edit beside the user type.
Tick the “Is Admin” box, then click Update. The Is Admin column will show Yes for that user type.
Staff with that user type will see Account Setting under the Profile menu, and it opens the full Account Settings page. You don’t need to tick Account Setting in Manage Access for them.
Only tick “Is Admin” for staff you trust to change your business details and account options.
NOTE: When staff with an Is Admin user type use Change Password on the Account Settings page, it changes the password for their own login, not the main admin account.
NOTE: Staff whose user type isn’t set to Is Admin only see Account Setting if it’s ticked for their user type in Manage Access (on the Page List tab, under Profile). They see a reduced Account Settings page, not the full one.
Was this article helpful?
That’s Great!
Thank you for your feedback
Sorry! We couldn't be helpful
Thank you for your feedback
Feedback sent
We appreciate your effort and will try to fix the article